We got the cover over the top installed yesterday. We couldn't have been able to do it without the help from my wife Rene, son Spencer, my Mom and Dad and my Uncle Mike and Aunt Lynda. It took 3 tries to get it over the top and secured, we didn't have much wind but even a little bit played havoc with the big sheet of plastic.
As you can see, we have a bit of a yellowjacket problem.
This is how full the trap was after being up for only 5 hours.
Thursday, August 8, 2013
Friday, August 2, 2013
I have been making some major improvements over the past couple weeks but I haven't been posting the updates to the blog, so I will post a few pictures here and try to give a little explanation to each one...
Spencer and I installed the baseboard along the two long sides of the high tunnel.
I got the 4 ground anchors attached and buried.
I did a 2" deep notch in the 6x6 posts to set the beam for the 10' tall doors on the ends.
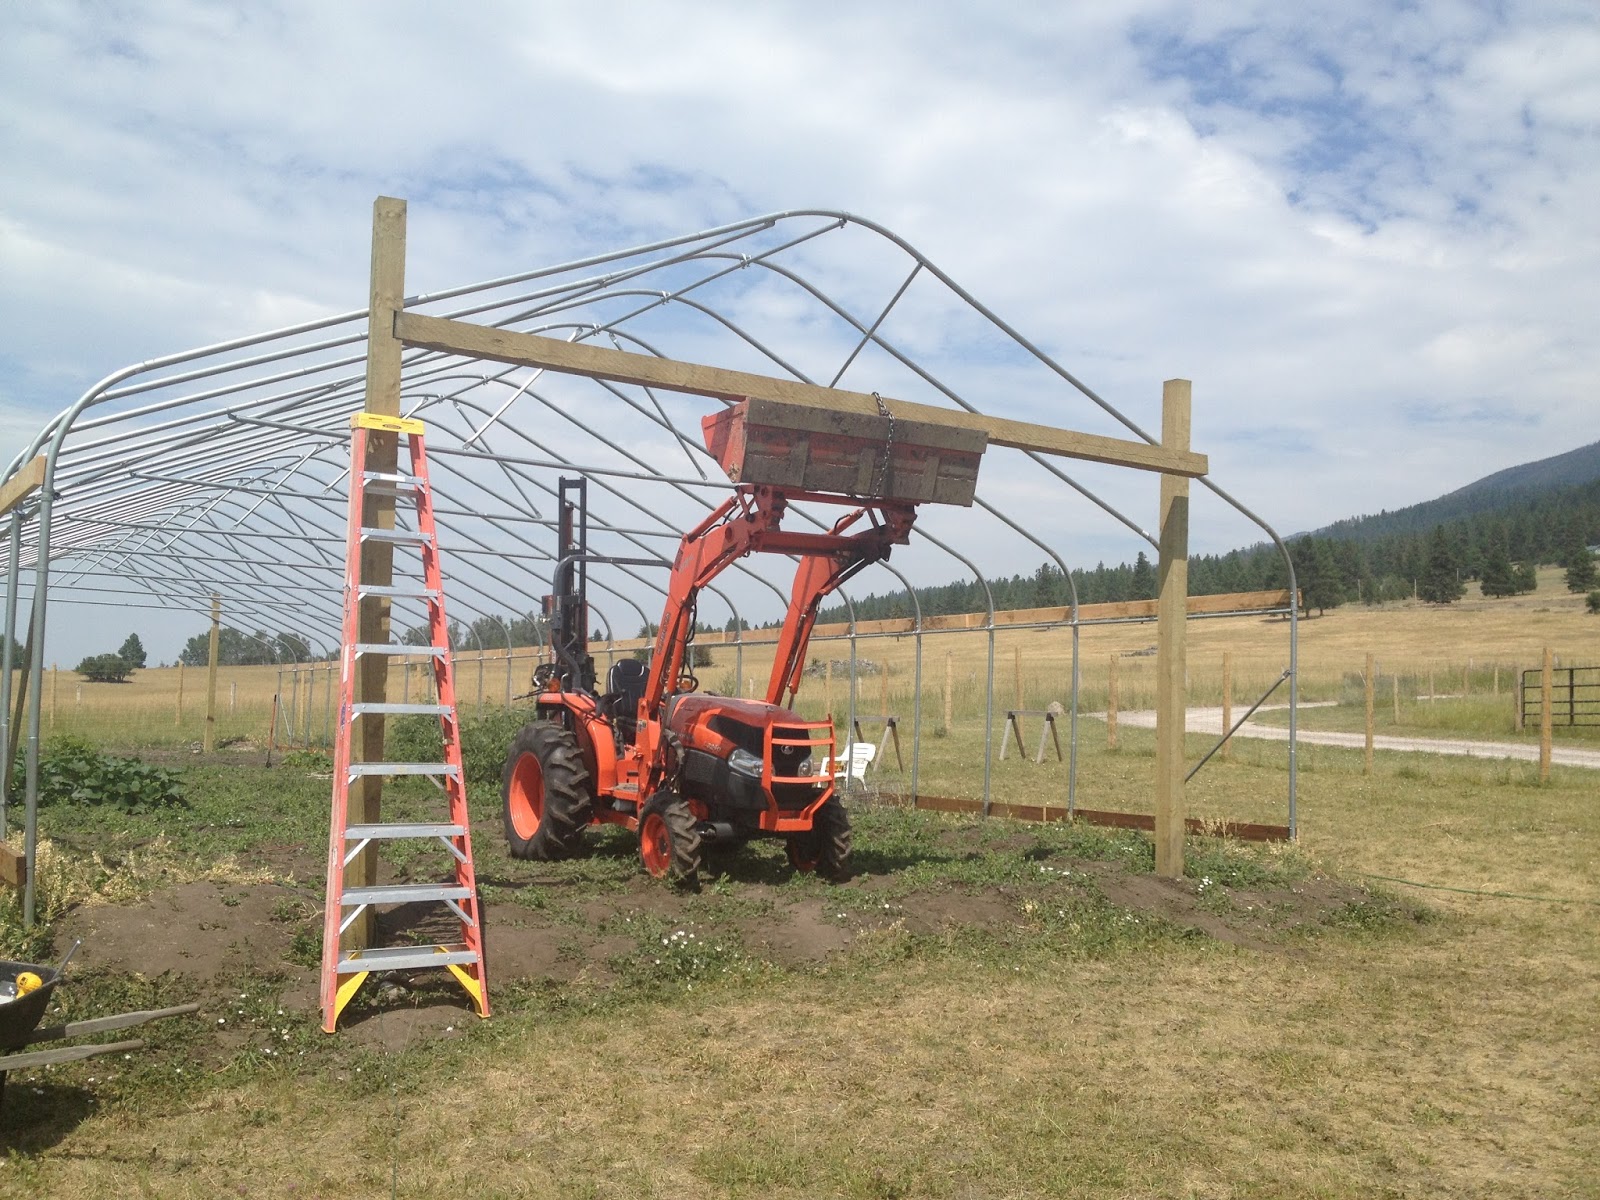
The tractor made it possible for me to set the 20' long 6x6 by myself.
I was pretty relieved to get this beam in place, but I couldn't find the brackets to secure the ends. They were 4x4 brackets anyway so I ordered larger brackets to use on the 6x6s. It will take a couple days for them to get here.
I installed the ribbon board and the two runs of U-channel.
I got the 6x6 brackets yesterday afternoon so I got right to work this morning. It seemed like several things were working against me today. First, the left 6x6 post had a twist in it so I had to take the beam out of the right side and square it into the notch on the left side, so I can install the bracket and then pull the beam back into place and take the twist out of the post. Second, it hasn't rained in 4 weeks, it decided to rain today, I'm not complaining, we need the rain but it could have come at a less stressful time. Third, just as soon as I got the beam out of the right post and squared into the left post, I was walking to the house to get the drill set up and ready to drill the holes for the bracket and set the lag bolts... THE POWER WENT OUT! Couldn't have happened at a worse time, I have the tractor holding up the loose end of the 20' beam and I need to be quick about securing the left side in the beam pocket. Instead of using the big drill to get through this quickly, I have to drill out the holes with the cordless drill (with the battery dying) and then set the lag bolts with a socket and ratchet, I got the bracket installed after nearly an hour and pulled the beam back into place on the other end, taking most of the twist out of the left post. Now it is on to getting the other bracket installed and then setting the beam on the other end of the tunnel.
My goal is to be finished with this project by August 17th. Soccer season starts on August 19th and I will be too busy to work on building the high tunnel.
Spencer and I installed the baseboard along the two long sides of the high tunnel.
I got the 4 ground anchors attached and buried.
I did a 2" deep notch in the 6x6 posts to set the beam for the 10' tall doors on the ends.
The tractor made it possible for me to set the 20' long 6x6 by myself.
I was pretty relieved to get this beam in place, but I couldn't find the brackets to secure the ends. They were 4x4 brackets anyway so I ordered larger brackets to use on the 6x6s. It will take a couple days for them to get here.
I installed the ribbon board and the two runs of U-channel.
I got the 6x6 brackets yesterday afternoon so I got right to work this morning. It seemed like several things were working against me today. First, the left 6x6 post had a twist in it so I had to take the beam out of the right side and square it into the notch on the left side, so I can install the bracket and then pull the beam back into place and take the twist out of the post. Second, it hasn't rained in 4 weeks, it decided to rain today, I'm not complaining, we need the rain but it could have come at a less stressful time. Third, just as soon as I got the beam out of the right post and squared into the left post, I was walking to the house to get the drill set up and ready to drill the holes for the bracket and set the lag bolts... THE POWER WENT OUT! Couldn't have happened at a worse time, I have the tractor holding up the loose end of the 20' beam and I need to be quick about securing the left side in the beam pocket. Instead of using the big drill to get through this quickly, I have to drill out the holes with the cordless drill (with the battery dying) and then set the lag bolts with a socket and ratchet, I got the bracket installed after nearly an hour and pulled the beam back into place on the other end, taking most of the twist out of the left post. Now it is on to getting the other bracket installed and then setting the beam on the other end of the tunnel.
My goal is to be finished with this project by August 17th. Soccer season starts on August 19th and I will be too busy to work on building the high tunnel.
Thursday, July 18, 2013
I know it's been a month since I posted, but I have been working on some other jobs and not making any progress on the high tunnel. I have started to get back to work on the tunnel over the past few days, I finished tightening down the rafter supports and I have started to install the ground anchors. The rafter supports and the ground anchors are not required for the NRCS program but it will help keep the structure together if we have higher snow loading or lateral wind loading. Yesterday, I poured concrete around the ground anchor bases and I also took a couple pictures of the plants we have growing inside the unfinished high tunnel. We have some nice tomatoes coming on and we are getting our first yellow straightneck squash.
Thursday, June 13, 2013
We got the 6x6 end posts set in the ground and we also got a tiller for the back of the tractor, so I was able to give the soil in the high tunnel a first tilling, yesterday. We also got a delivery for the rafter supports that we decided to add, this will help with the snow and wind loading.
The instructions were to use 4x4 posts for the end framing but we decided to upgrade to 6x6s, I just wasn't comfortable with the 4x4s and I feel like the 6x6s will give added structural integrity.
Subscribe to:
Posts (Atom)